How to use a Cafetiere - A Brew Guide
How to make the perfect cafetiere coffee
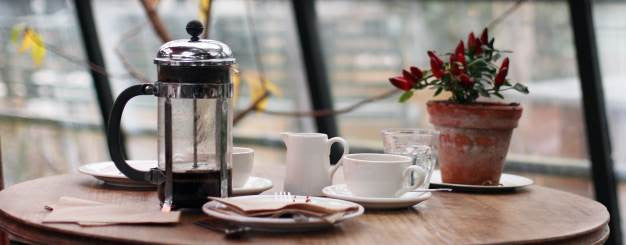
The Pebble & Pine guide to using the cafetiere for great results every time.
Using a cafetiere, or french press, to brew your coffee is a fantastic and cost effective way of achieving a really nice cup of coffee. This guide will explain how you can use this great brewing method to get a lovely tasting cup of coffee every time.
The cafetiere has fallen out of favour with many in recent times and I think the reason for this is that it's usually not done correctly. Often inferior tasting coffee is used or possibly it's that the coffee is too finely ground or the water is used straight out of the kettle and is too hot.
Hopefully this "how to" guide will get you on the right track to producing a great cup of coffee with the cafetiere every time.
Choosing a Cafetiere / French Press
You can pick up a cafetiere pretty much anywhere, although be aware that the filter mesh may not be fine enough in the cheaper ones to trap the smaller granules; so you may end up with some stray grounds floating around in your cup.
My advice for choosing a cafetiere is to go for one that can be taken apart for easy cleaning. Coffee grounds get stuck in the gap between the filter mesh and the metal plate and they're a nuisance to remove if you can't dismantle it.
The traditional kind of cafetiere has a glass (usually Pyrex) container, although you can now get stainless steel and even stoneware ones that will keep the coffee warmer for longer.
Who Invented the Cafetiere?
The inventor of the cafetiere, also commonly known as the French press, was not French as the name might suggest, but rather an Italian. The creation of this popular coffee brewing device occurred in 1929.
Now let's get to it. Here is the definitive guide to brewing a great cup of our speciality coffee in the cafetiere.
Equipment
- Pebble and Pine freshly roasted coffee beans or medium to coarse ground coffee
- A cafetiere
- A coffee grinder (if you have beans of course!)
- A kettle
- A kitchen Scale (optional)
The Cafetiere Brewing Process
1. What Coffee Should You Use with a Cafetiere?
When using a cafetiere, it is recommended to opt for medium or dark roast coffee. These roasts enhance the coffee's natural oils, which are essential for achieving a full-bodied and robust flavour. Since a cafetière does not use filter paper, these oils remain in the brew rather than being absorbed, thus enriching the coffee's overall taste.
2. Fill the Kettle and Boil
Make sure there is more water than is needed to fill the cafetiere. You'll need some of the extra water to pre-warm the cafetiere - it'll improve the extraction.
3. Grind the Coffee Beans
The coffee grind is extremely important for a cafetiere.
If you have whole coffee beans, while the kettle is boiling, grind the beans on a coarse setting. Since the cafetiere employs the immersion method, the coffee beans need to be coarsely ground. Too fine and the plunger will be hard to push down and the coffee will end up over-extracted.
The other point to consider here is that the mesh used in the cafetiere is usually not particularly fine. If you have finely ground coffee then there is a good chance some of those grounds will slip through the mesh and into your final cup of coffee. The answer to this is to either buy your coffee specially ground for the cafetiere or get your hands on a decent burr grinder and grind the beans yourself.
The use of a burr grinder is important. Cheaper coffee grinders act a bit like a food processor and chop the beans up into granules with metal blades. The problem with this is that the grind is inconsistent and you'll get some very fine particles (and dust) mixed in. This will result in an uneven extraction and some of those bits will end up in your cup.
The additional advantage of grinding the coffee beans yourself is that coffee stored in whole bean form keeps much longer. So my biggest recommendation is to invest in a burr grinder - it's well worth the additional cost.
4. Pre-Heat the Cafetiere
Once the kettle has boiled, pre-heat the cafetiere by pouring some of the boiling water into it and swirling around. Discard the hot water. This part of the process will improve the evenness of the extraction by avoiding cool spots.
5. Measure out the Coffee
Using the scales, measure out the coffee. If the scales are the flat kind you can stand the cafetiere on them and tare (i.e. reset to zero).
How much coffee should you put in a cafetiere?
As a rough guide you'll need approximately 30 to 35 grams of ground coffee to 500ml of water.
You can experiment with the amount of coffee you use to get the strength you like. If you don't have scales then I would suggest a couple of tablespoons of coffee grounds per 500ml and experiment from there.
6. Pour in a Little of the Hot Water
Pour the hot water into the cafetiere so that it just covers the ground coffee granules in the bottom. It should have been at least 45 seconds since the kettle finished boiling.
This is important because you shouldn't pour boiling water on the coffee.
You should see the ground coffee expand and bubbles appear on the surface. This is the "bloom" and lets you know that the coffee is fresh. The bubbles are from Carbon Dioxide trapped in the coffee during the roasting process.
Over time it is gradually released from the roasted beans (along with the flavour molecules) so absence of any bubbles when you pour hot water on them is a sure sign you need to get some fresher beans.
7. Stir Gently
Give the grounds a gentle stir with a wooden spoon and allow them to stand in the cafetiere for 30 seconds. This time allows most of the CO2 gas to escape and ensures you get a fresh tasting cup with bags of flavour.
8. Fill with the Remaining Hot Water
Add the rest of the water to the cafetiere and position the lid on top. But don't plunge just yet. Wait for it to brew!
9. Wait 4 Minutes for it to Brew
Getting the best extraction out of your coffee takes a little patience, but it's worth it.
Leaving coffee in the cafetiere to brew for four minutes is about right. You can vary the amount of time to suit your taste. Of course the longer you leave it to brew the stronger the flavour.
If the coffee is still a bit weak after 4 minutes then it's probably ground too coarse or the temperature of the water is a bit on the low side. Try a slightly finer grind next time and see if that does the trick.
10. Scoop out the Grounds Floating on the Top
After the time is up, scoop out most of the coffee grounds floating at the top of the cafetiere and place the lid containing the cafetiere plunger on top.
This step halts the brewing process and is an added precaution to make sure the coffee grounds don't escape through the filter mesh into your coffee. You don't want those bits floating around!
11. Push Down the Plunger
Now push the cafetiere plunger gently down. There should be a small amount of resistance. If it's hard to push down then the coffee is too finely ground. If there is no resistance then it is too coarse.
The coarseness of your coffee grind is critical for the best results.
If you have your own coffee grinder then you can experiment with different grind settings until you get something you like. But remember, use a burr grinder and keep it coarse to avoid those floaty bits.
12. Pour Immediately and Enjoy!
When the cafetiere plunger is all the way down, serve immediately and enjoy!
The following excellent video shows how to use a cafetiere / french press.
Cleaning your cafetiere
Immediately after use dismantle the cafetiere and rinse all the parts under the tap. If you have a glass cafetiere please take care; the glass has been known to break during cleaning.

Now you know the best way to use a cafetiere check out our freshly roasted coffee beans, perfect for use in a cafetiere, in our online shop. Get 20% discount off your first order with discount code PEBBLE.